How to: Transform PDF files to GeoJSON and upload to the Sympheny web-app
PDF data may hold important information, such as network paths and pre-defined building clusters. This document is a step-by-step guide to transform your data stored in pdf files into a geojson file, which can be directly uploaded to Sympheny.
1. Prerequisite: Install QGIS
1.1 Download and install QGIS: Download QGIS
1.2 Install the Open Street Map Plugin:
Plugins → Manage and install plugins → search for ‘QuickMapServices’ → install
Repeat for the plugin ‘OSM place search’
2. Prerequisite: Install OSM plugin on QGIS
2.1 Access Open Street Map:
Web → QuickMapServices → OSM → OSM Standard
2.2 Find your location by zooming on the map, or go to
Plugins → OSM place search → OSM place search → enter the name of the place you are looking for under the field Name contains … and double click on the result you want to go to
3. Georeferencing
This section is mostly referenced from the QGIS documentation (here).
3.1 Layer → GeoReferencer
3.2 Click on Open Raster (first icon) and select the pdf or image you want to georeference
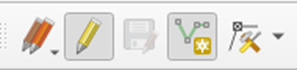
3.3 Click on the 8th icon (second icon squared in the image, → Add point) and select From Map Canvas in the Enter Map Coordinates Window. Place the point at the corresponding location on the canvas. Repeat this for at least 3 points. Select points distant from one another as much as possible.

Open Raster add point
3.4 In this example, the following setting were applied under Setting (symbol ⚙️ in yellow):
→ polynomial 1 as the transformation type
→ set target resolution box is ticked
3.5 Select the 3rd icon Start georeferencing (▶️ in green) and wait for it to finish.
3.6 Your pdf is now georeferenced on the basis of the Open Street Map map
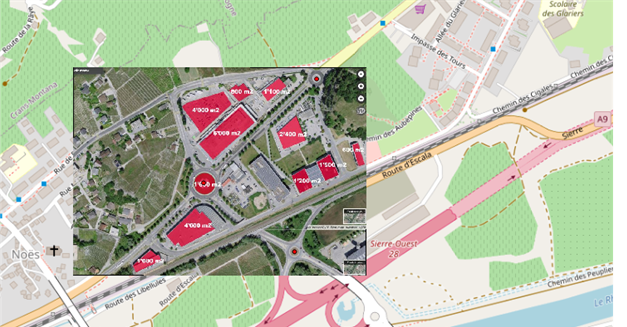
Example of geo-referenced image in QGis
4. (Re)Draw the geometries you want to import into Sympheny
4.1 Go to Layer → Create Layer → New shape file layer
4.2 Choose a location and name to save your layer (e.g. Networks or Hubs). Under Geometry type, select the type of geometry you are defining, for example LineString for Networks or Polygon for Hubs. Click Ok to close the window.
4.3 Click on Toggle Editing (pencil symbol, ✏️ ) and then on the symbol on the right Add line feature or Add polygon feature.
4.4 Trace your features. Right click to complete a segment. When prompted, give it an ID to distinguish the line feature.
5. Export the geometries to a GeoJSON file
5.1 Right click on the layer you want to export → Export → Save feature as
5.2 Select the format GeoJSON. Name your file and folder where you want to save the file → OK
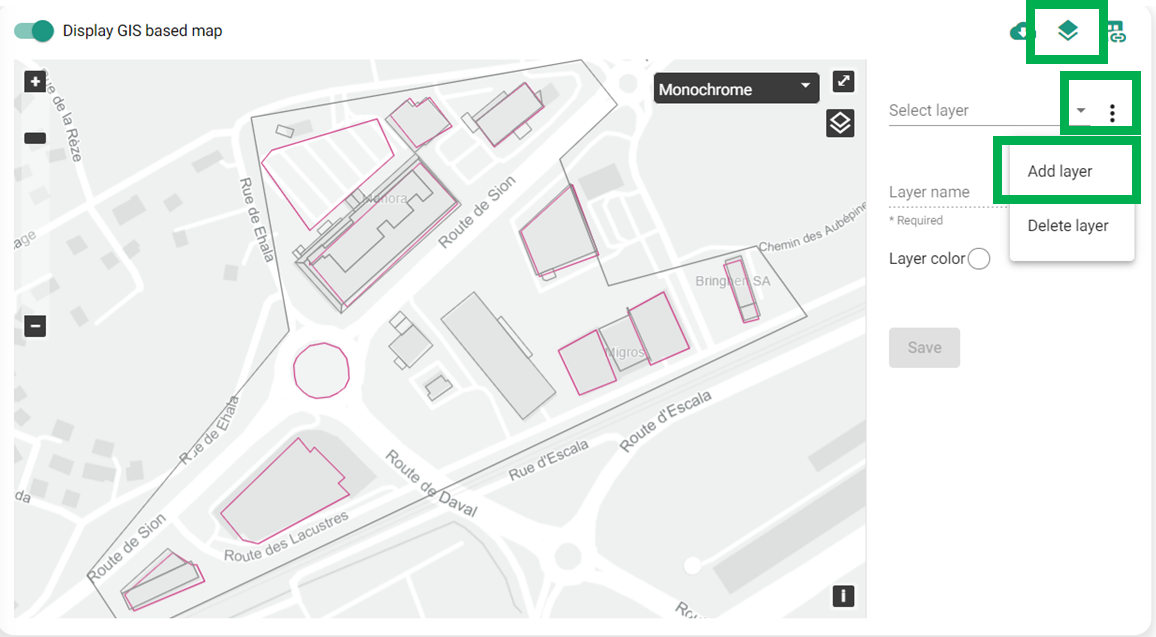
6. Upload GeoJSON files to Sympheny
Into your Sympheny project, activate the GIS based map and select the second icon (layers). Clicking then on the three vertical dots, you will be able to select the add layer functionality and to upload the GeoJSON file you saved under step 5. You can now use this map to re-draw your hubs and/or networks.