7 - Database Center
The Database Center is the page giving you the overview on all your data. On this page, you can can also download databases or upload databases to the WebApp from other sources.
Overview of the available databases
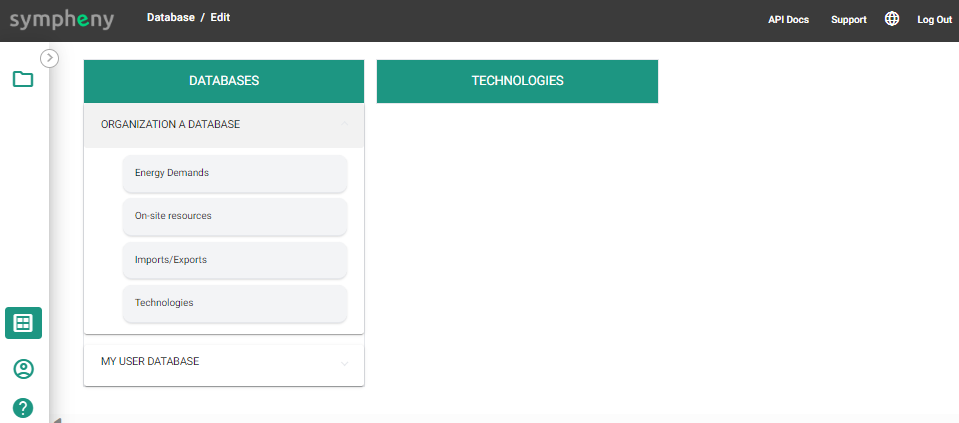
Within the Sympheny Database Center (icon :databaseicon: at the bottom left of your screen), you have access to up to two databases:
My User Database: this database is your own private database. Individual users can directly maintain this database.
“Organization” Database: this is the database specific to your organization (available for Enterprise clients). This database is named after your organization, and only accounts from your organization have access to this data. The assigned Super Users from your organization can maintain this database, such as uploading and deleting data. The data is available for all accounts within your organization.

Download databases
It may be useful to download your database if you would like to have an overview of all of your data or do some post-processing, adjusting, etc.
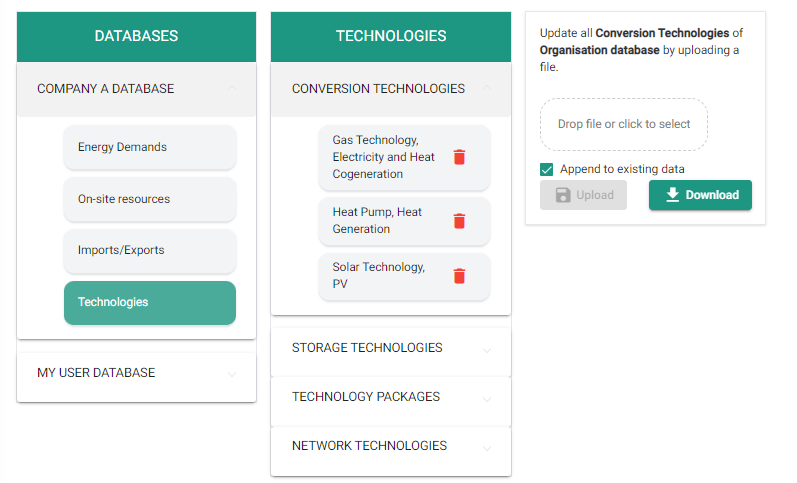
To download your data, simply navigate to the database and the type of data you’d like to download (e.g., Energy Demands, On-site Resources or the category of Technologies). On the right side of your screen, you will see a Download button. After clicking on it, scroll to the bottom of the page, where you’ll have to press the download arrow, to open the data in excel.
Tip: The format of the downloaded excel file is the same that the one required for the upload of databases.

Database Download - Step 1

Database Download - Step 2
Upload databases
Data Format/Template
To upload data to your databases, you first have to prepare your data with the correct format. Different parameters can be entered depending on the type of data you wish to upload.
Transition to V3
With the transition to Sympheny’s V3 and the introduction of new parameters and the new calculation of the output efficiency, the database structure in excel for conversion technologies now has a column Version, indicating if the technology has been entered according to V3 prescriptions or not.
When using V3, you still have access to the technologies entered within V2. When used within a V3 scenario, the output efficiency of the technology is re-calculated, using the equations stated here. On the other hand, as V2 will eventually be phased out, technologies entered in V3 will not be made available for V2.
The main added parameters in V3 are listed here. For technologies saved in V2, the default value is given in brackets.
Primary Modes (Default for multiple modes: all as primary)
Fixed replacement cost (CHF) (Default: 0)
Variable replacement cost (%) (Default: 100%)
Variable replacement cost (CHF/kW) (Default: 0)
Fixed salvage value (CHF) (Default: 0)
Variable salvage value (%) (Default: 100%)
Variable salvage value (CHF/kW) (Default: 0)
Note that for the Network technology, the parameter ''Network loss (%/m)” is not to be entered anymore in the V3 database, as it is entered at the link level, and not anymore at the Network Technology Candidate level.
Conversion, storage and network technologies
Here you can download the templates for the upload:
Conversion Technology Template
Storage Technology Template
Network Technology Template
Energy Carriers (EC) have to follow the exact nomenclature given in the table below.
Nevertheless, after adding a specific technology from the scenario editor, the Energy Carriers can be changed to any other ECs that are available in the respective scenario.
Energy Carrier Name | Nomenclature for templates |
Cooling -20 - -10°C | COOLING_1 |
Cooling -10 - 0°C | COOLING_2 |
Cooling 0 - 10°C | COOLING_3 |
Cooling 10 - 20°C | COOLING_4 |
Ice | ICE |
Electricity | ELECTRICITY |
Electricity Renewable | ELECTRICITY_RENEWABLE |
Biogas | BIOGAS |
Gas | GAS |
Hydrogen | HYDROGEN |
Hydrogen Pressurized | HYDROGEN_PRESSURIZED |
Oil | OIL |
Coal | COAL |
Wood Chips | WOOD_CHIPS |
Wood Pellets | WOOD_PELLETS |
Heat 0-10 °C | HEAT_1 |
Heat 10-20 °C | HEAT_2 |
Heat 20-30 °C | HEAT_3 |
Heat 30-40 °C | HEAT_4 |
Heat 40-50 °C | HEAT_5 |
Heat 50-60 °C | HEAT_6 |
Heat 60-70 °C | HEAT_7 |
Heat 70-80 °C | HEAT_8 |
Heat 80-90 °C | HEAT_9 |
Heat Ambient | HEAT_AMBIENT |
Steam Low Pressure | STEAM_LOW_PRESSURE |
Biomass | BIOMASS |
Geothermal | GEOTHERMAL |
Hydro | HYDRO |
Process Waste Heat | PROCESS_WASTE_HEAT |
Solar Facade | SOLAR_FACADE |
Solar Parapet | SOLAR_PARAPET |
Solar Roof | SOLAR_ROOF |
Tidal | TIDAL |
Wind | WIND |
Energy Demands
For uploading Energy Demands profiles, you will need to fill in an excel with two sheets.
In the sheet 1, you will have to enter information about your profiles, including the corresponding Building Use, the Demand Type, the Building Age or Standard and the Specific Energy Demand.
You can upload your demands as part of one of the four Demand Types below. They should use the following nomenclature:
Demand Names | Demand Types |
|---|---|
Electricity | ELECTRICITY |
Space Heating | SPACE_HEATING |
Hot Water | HOT_WATER |
Cooling | COOLING |
The Building Use should use the following nomenclature:
BuildingUseType |
|---|
RESIDENCE_MFH |
RESIDENCE_SFH |
ADMINISTRATION |
OFFICES |
SCHOOLS |
RETAIL |
RESTAURANT |
ASSEMBLY |
HOSPITALS |
INDUSTRY |
WAREHOUSE |
SPORTS_CENTER |
INDOOR_POOL |
HOTEL |
For the Building Age or Standard of your profile, give here information for you to know where the profile comes from. You will also have to give it specific energy demand. Please note that you will still always have the possibility later on, when selecting an energy demand in a specific scenario, to scale it based on annual energy demand in kWh.
In the second sheet, you will enter the profiles, normed at 1 kWh. Make sure that the naming of row 1 in the sheet number 2 corresponds to the naming in the column A of sheet number 1.
Upload
Similarly to the download steps, select the database you wish to replace/add data to as well as the type of data (Energy Demands, On-site Resources or the category of Technology). As prompted, drop or click to select your file and then press upload.
By default, any data you upload will be "added" to the existing database. If you want to add new data without replacing the current content, ensure the 'Append existing data' option remains checked. If you prefer to replace the entire database with the new data, uncheck the "Append to existing data" option. Please note that this will overwrite the existing database entirely.

Database upload
Finally, note that the databases that you are allowed to modify depend on your roles and permissions within your organization.
Roles & Permissions
Depending on the account type and the license, different rights are available to different users.
Sympheny Global Database | Organization Database (from Enterprise license on) | My User Database | |
|---|---|---|---|
Download | No Users | All Users with account linked to the Organization | Individual user |
Upload | No Users | Only Super Users from the organization | Individual user |
Direct upload within the Scenario
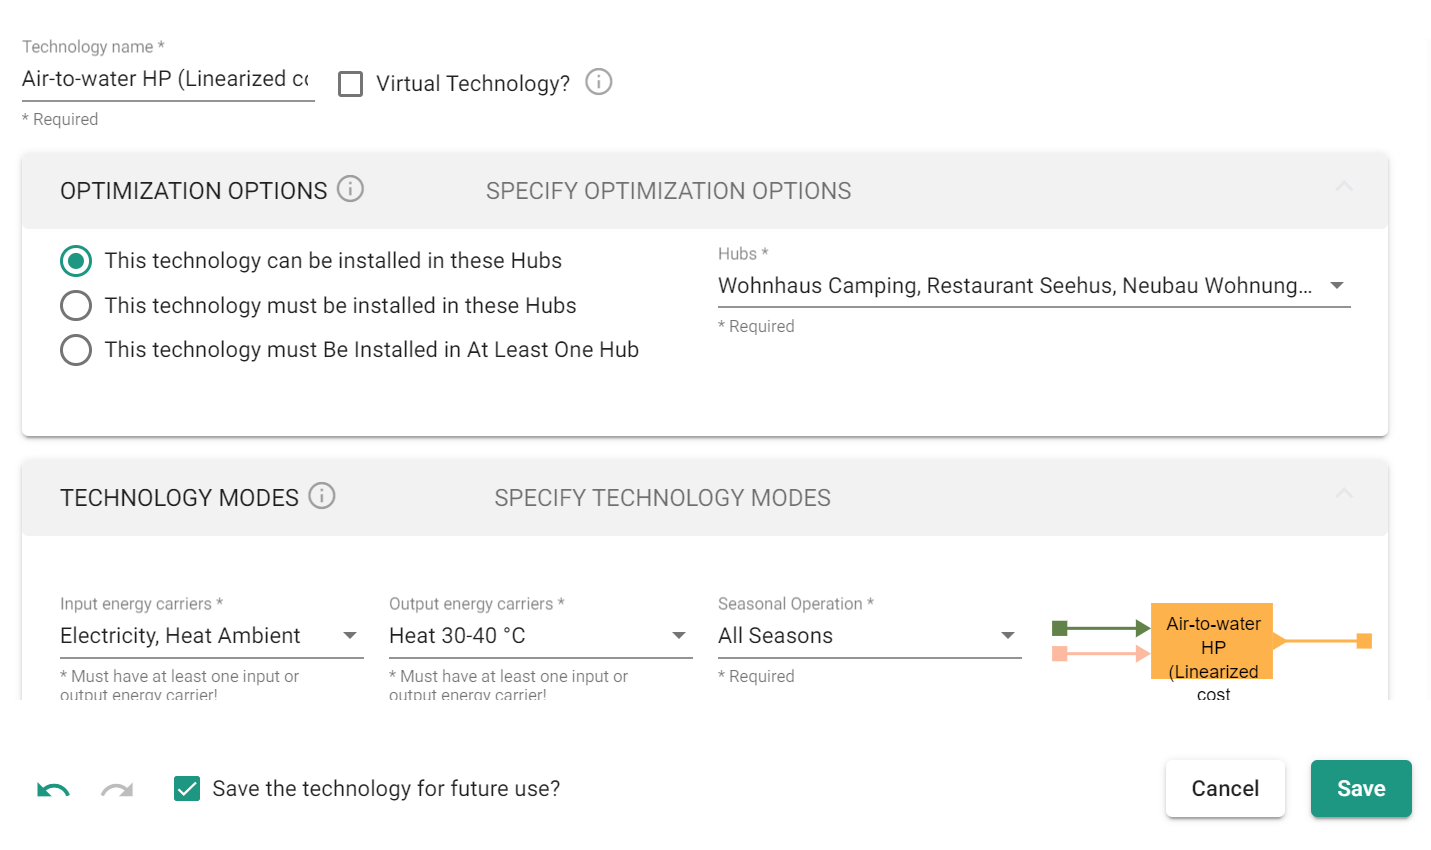
Single items can also be uploaded to My User Database directly from the scenario editor (i.e., Setup), by ticking the box ‘Save the technology for future use?’.

